
Selection Screen User GuideHow to use the Selection Screens in Colleague.
Colleague supports several methods of record access, whether that be through the Quick Search, Search, Recent Items or Lists, but the main entity lookup options are the Selection Screens. Selection Screens are available from the left hand navigation menu. These allow you to perform optimised searches against each of the main entity records using some basic filtering criteria.    Working with Selection Screens Working with Selection ScreensFrom within the Candidate, Company, Contact and Requirement screens you will be able to create new records. This process will carry over the fields you have searched into the new record form. 
The Candidate Selection Screen will give you access to the CV Parser. This is also available from the left navigation menu, Documents Received and the Outlook Add-in. Select Parse CV and choose the file you wish to parse to create a new Candidate record. 
When dealing with cross reference fields, such as looking up a Company or Contact when using the Requirement Selection Screen, you will be able to type the record Name into the fields or use the magnify glass to lookup the record. 
The list of columns which are used to show the results are defined by the Options. From this area you will be able to access all the fields that have been made available via the Data Dictionary. Tick the fields you would like to see and drag and drop to optimise the column ordering.  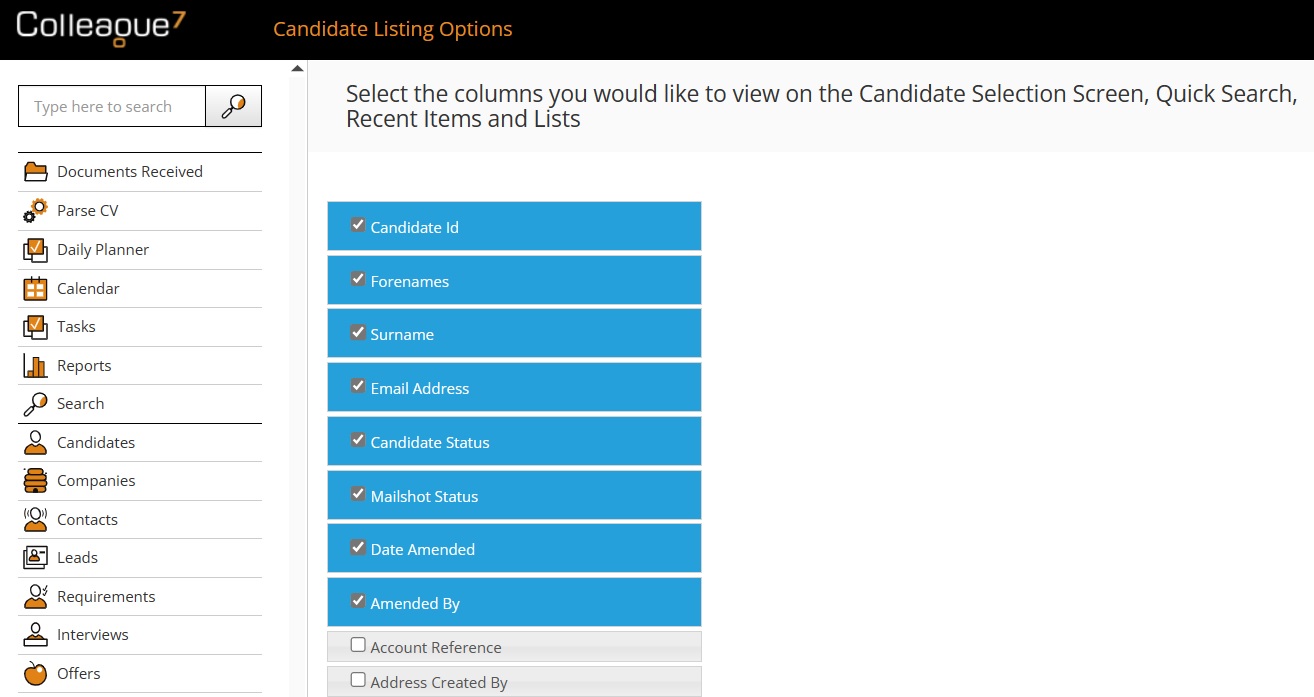 When a search is run (either by clicking on 'Search' or by pressing the 'Enter' key), the search criteria will be hidden. This can be shown again by clicking on the Show Criteria button. 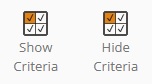
When looking at the results, you will notice that you can sort the records by clicking on the column header. To open a record, click on any of the record info within the table row. An additional option that is available from Selection Screens is the Summary View. The Summary View will present a summarised overview of the record within a panel shown on the right hand side. From this panel you will be able to view and edit fields from the record, Create History, view Documents, Skills and History. When you have selected a row from a Search Result, you will see an icon appear in the toolbar:   Based on User Group Permissions, you can export the Selection Screen results into Excel. If your User has been granted the necessary permissions, from the toolbar you will be able to hover over the Excel icon and click Export All. If you wish to only export a selection of records, once you have ticked the required records, you will also see the option to Export Selected. 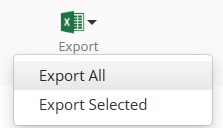
The Placement Selection Screen offers the additional capability of emailing the Candidates or Contacts associated to the Placements. When you have selected the required Placements, click Email and choose whether you are emailing the Candidate or Contact. An email form will be generated with the relevant record email addresses listed in the 'To' field, ready to be sent as a bulk email. 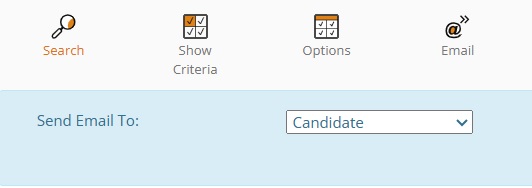
When on the Placement Selection Screen, it is possible to enter a Timesheet against multiple Placements in a single workflow. This is only intended for recording standard rate Timesheet submissions. Timesheets with multiple rates and various units of measure should remain submitted from within the Placement record. As a user, when on the Placement Selection Screen, if you search on the term 'Contract' AND/OR 'Rolling Contract' along with the Authorisation Level 'Level 2', within the toolbar you will then find the option to 'Add Timesheet(s)': 
As standard this feature is configured to only allow bulk timesheets against the same Company record. If you would like to submit a Timesheet against multiple Placements from different Companies there is a Global Setting to enable this: Admin > Global Settings > Placement section > Allow option to 'Add Timesheet' across multiple Companies on Placement Selection Screen - Yes/No Once you have selected your intended Placements and clicked 'Add Timesheet(s)', it will produce an alert, allowing you to enter the following fields:
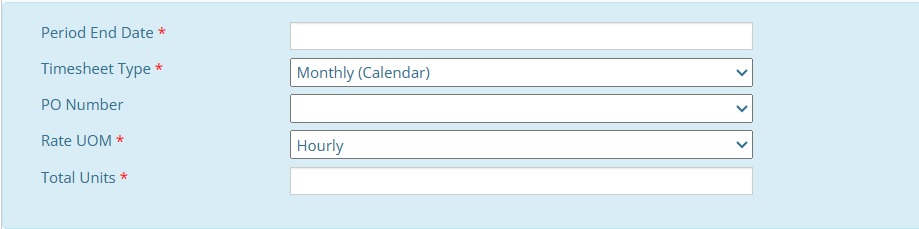
Once you have entered your intended Timesheet, press 'OK'. The bulk timesheet process will perform a validation check to ensure that the selected Placements match the specified Timesheet Type, Rate UOM/Charge Unit. It will also check that the entered Period End Date is within the Placement Start/End Date Range. If the Placement passes these validation checks a Timesheet is created. When the workflow is complete, any failures during this process will result in an alert with a description on the reason for the failure: 
The Placements that are not on this list will have a timesheet successfully created against them. The ID of the Placement on the failure alert will be a link to open the Placement in a new tab. N.B: It is currently possible to create more than one Timesheet against a Placement with the same Period End Date. |