
Calendar, Tasks and Daily Planner User GuideHow to use the Calendar, Tasks and Daily Planner in Colleague.
 Calendar CalendarThe Calendar within Colleague is a complete integration with your 365 Calendar in Outlook. Entries made into your Calendar via Outlook or within Colleague will be completely synchronised. Examples of Calendar Events include scheduled calls, interviews, meetings and Placement start/end dates. Select the Calendar option from the left hand navigation menu: 
This will collect and display the latest Calendar Events from your 365 Calendar. Top left there will be an option to "Create Calendar Entry": 
Calendar entries created in Colleague can be associated to a record. If a User chooses to do this, there will be a link to that record from within the Calendar entry. To link a record, click on the magnify glass and type in a search criteria. 
You can then enter the necessary Subject, Start Date/Time, End Date/Time, Time Zone and Reminder details. The default behaviour of these details will be pre-populated based on User and/or Global Settings: 
Press 'Save' and the entry will be added to your 365 Calendar and visible within both Colleague7 and Outlook. When on any record in Colleague, you will have the option to create a Calendar entry via the 'Calendar/Task' menu option. Select 'Create Calendar': 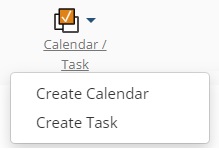
The benefit of creating a Calendar entry from a record is that the record will be automatically associated to the Calendar event, with a link to the record included in the message body. When on any record in Colleague, and creating a History, you will have the option to create a Calendar entry via the 'Create Calendar' tickbox: 
The benefit of creating a Calendar entry from a history log is that the associated record will be automatically linked to the Calendar event, with a link to the record included in the message body. This creates a full audit trail of the history and the follow up. When in the Calendar, if you select a Calendar entry, it will give you the details of the selected event. This includes the ability to now edit that Calendar event. If you make the necessary changes, on pressing 'Save' it will update your Calendar. 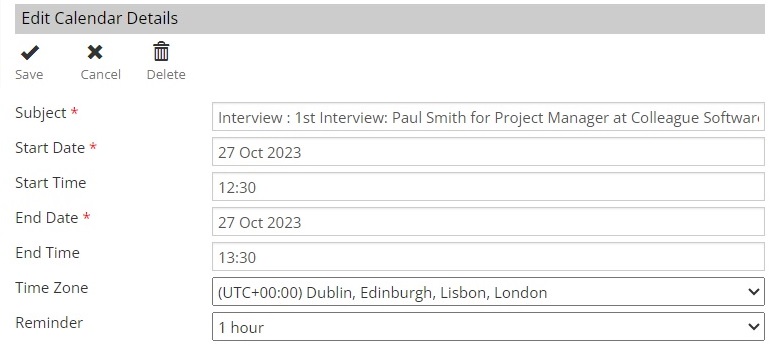
Due to the 365 synchronisation, if you edit the Calendar event within Outlook it will also update Colleague. When in the Calendar, if you select a Calendar entry, it will give you the details of the selected event. This includes the ability to delete that Calendar event. On pressing 'Delete' it will remove the event and update your Calendar. Due to the 365 synchronisation, if you delete a Calendar event within Outlook it will also update Colleague. Based on User Group Permissions within the Admin area of Colleague, and your permissions within your 365 account, if enabled to do so, you will have a User dropdown available to you that allows you to select other Users and create Calendar events on their behalf: 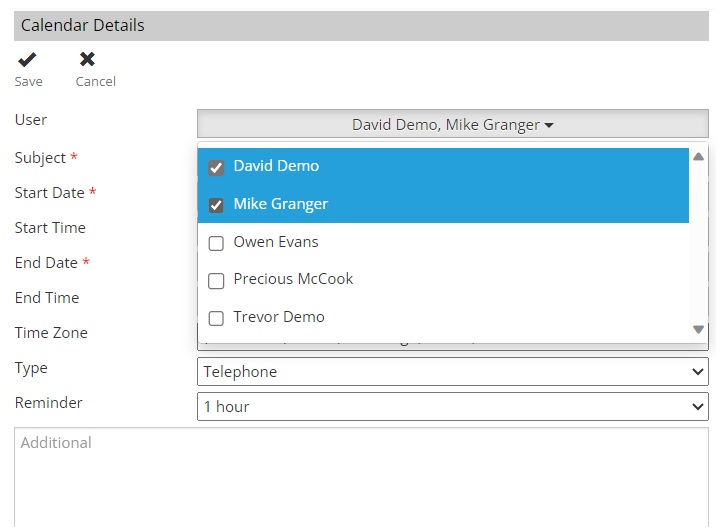
Tick the Users you want to receive the Calendar event and press 'Save'.  Tasks TasksTasks within Colleague are fully integrated with your 365 'ToDo' Tasks in Outlook. Tasks created via Outlook or within Colleague will be completely synchronised. Examples of Tasks include follow up calls, call backs and in general 'to do' list style items to remind users of outstanding items. Select the Tasks option from the left hand navigation menu: 
This will collect and display the Tasks from your 'ToDo' Tasks in Outlook against your 365 account. Top left there will be an option to "Add New Task": 
Task entries created in Colleague can be associated to a record. If a User chooses to do this, there will be a link to that record from within the Task. To link a record, select the entity type and then click on the magnify glass and search for the record: 
You can then enter the necessary Subject, Start Date, Due Date, Priority and Reminder Date/Time details. The default behaviour of these details will be pre-populated based on User and/or Global Settings: 
Press 'Save' and the entry will be added to your 365 'ToDo' Tasks in Outlook and visible within both Colleague7 and Outlook. When in the Tasks area, to complete a Task, select (via tick box) one or more Tasks and then you select "Complete Task": 
If you would like to immediately create another task against the same record, select the task (via tickbox) and then select the "Complete Task and Add Another". This will complete the selected Task and launch a new form to add the new Task details. The new Task will be automatically associated to the record of the previous Task. Tasks have an assigned priority to categorise their importance. If you would like to prioritise or lower the importance of a Task, select one or more Task(s) and then choose "Change Priority". You will be given a drop down of the priorities: Low, Normal, and High. Select your preference and click "OK". 
Due to the synchronisation with 365 account, if you edit a Task from within Outlook it will also update Colleague. Within Colleague, to edit the details of a Task, select the task and choose "Edit Task". 
When you have updated the Task with the necessary details, press 'Save'. Extending a Task is to push the 'Due Date' of the Task further into the future. If you would like to extend a task, select the Task and click "Extend Tasks": 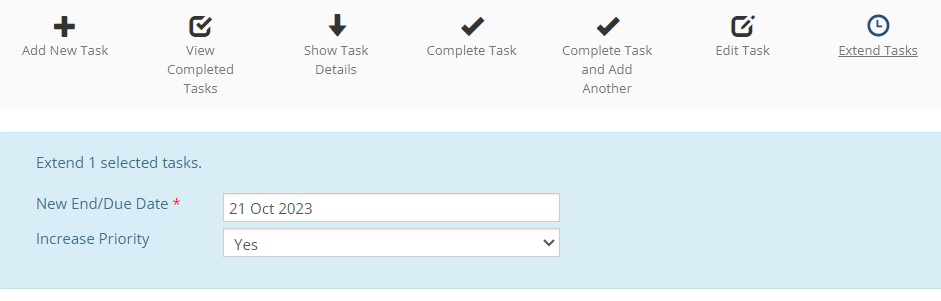
Select the new Due Date of the Task and whether to increase the Priority as part of the extension. Increasing the priority of a task will set a 'Low' priority Task to be 'Normal' or a 'Normal' priority Task to be 'High'. Tasks are listed in a table to the User with an overview, however if you would like to view the details of a Task, select the Task and click "Show Task Details": 
On selection, the label to this option will update to read "Hide Task Details", click this to minimise the Task details. If you would like to view the Tasks you have completed, select the "View Completed Tasks" option: 
You will then need to enter a date range for the system to bring back Tasks you have completed. When ready, select "OK". This will display the Tasks completed within that period. Based on User Group Permissions within the Admin area of Colleague, and your permissions within your 365 account, if enabled to do so, you will have a User dropdown available to you that allows you to select other Users and create Tasks on their behalf: 
Tick the Users you want to create a Task for and then press 'Save'. Daily PlannerThe Daily Planner is available from the Homepage of Colleague and is designed to give Users a summarised overview of their Calendar Events and outstanding Tasks. This is again fully synchronised with your 365 Calendar and Outlook Tasks (ToDo). The Daily Planner is available from the Homepage and Daily Planner option on the left hand navigation menu: 
By default, the Daily Planner will list the User's Calendar events occuring today and the Tasks due today (or overdue from previous days). Overdue tasks will have their 'Due Date' highlighted in red font. 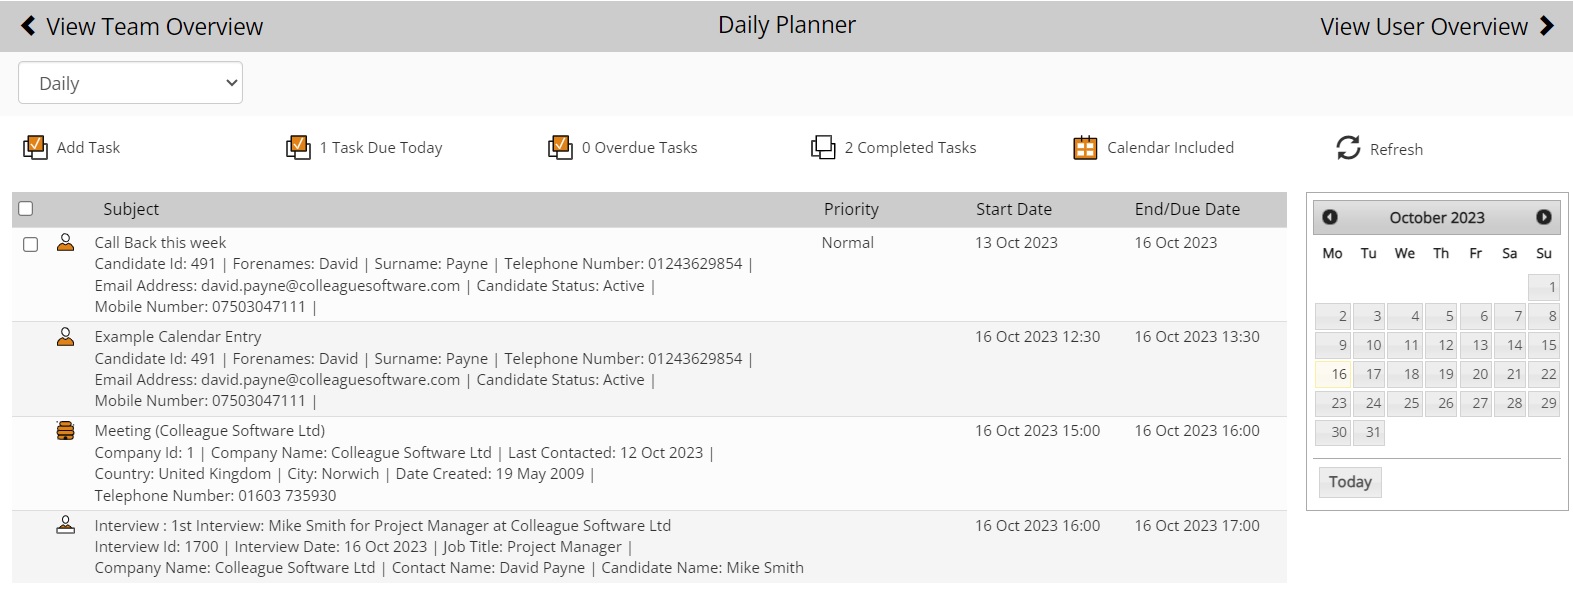
The subject section of a Daily Planner entry will advise the title of the event. Provided the entry is linked with a record, it will also display the record details (as configured via the Quick Search) and be linked to the record in Colleague. Tasks will include a tickbox to enable the additional options to Complete, Extend or Change Priority (as per the options listed in the Tasks area). 
Tasks will be listed in Priority order. The ability to add a Task is available from the context menu: 
You will be advised how many Tasks are due today and how many are overdue: 
You can also choose whether to include 'Completed Tasks' via the checkbox in the context menu: 
Completed Tasks are shown with a line scribed through the center of the Subject text: 
And you can choose whether to include Calendar Events via the 'Calendar Included/Excluded' checkbox in the context menu: 
The range of the Daily Planner can be adjusted to show events based on the day, week or month via the dropdown top left of the Planner: 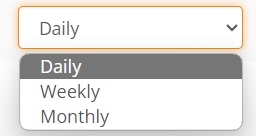 |